Author: Kate Shao

As its name suggests, searching for videos by image is the process of retrieving from the repository videos containing similar frames to the input image. One of the key steps is to turn videos into embeddings, which is to say, extract the key frames and convert their features to vectors. Now, some curious readers might wonder what the difference is between searching for video by image and searching for an image by image? In fact, searching for the key frames in videos is equivalent to searching for an image by image.
You can refer to our previous article Milvus x VGG: Building a Content-based Image Retrieval System if interested.
1. System overview
The following diagram illustrates the typical workflow of such a video search system.
When importing videos, we use the OpenCV library to cut each video into frames, extract vectors of the key frames using image feature extraction model VGG, and then insert the extracted vectors (embeddings) into Milvus. We use Minio for storing the original videos and Redis for storing correlations between videos and vectors.
When searching for videos, we use the same VGG model to convert the input image into a feature vector and insert it into Milvus to find vectors with the most similarity. Then, the system retrieves the corresponding videos from Minio on its interface according to the correlations in Redis.
2. Data preparation
In this article, we use about 100,000 GIF files from Tumblr as a sample dataset in building an end-to-end solution for searching for video. You can use your own video repositories.
3. Deployment
The code for building the video retrieval system in this article is on GitHub.
Step 1: Build Docker images.
The video retrieval system requires Milvus v0.7.1 docker, Redis docker, Minio docker, the front-end interface docker, and the back-end API docker. You need to build the front-end interface docker and the back-end API docker by yourself, while you can pull the other three dockers directly from Docker Hub.
# Get the video search code
$ git clone -b 0.10.0 https://github.com/JackLCL/search-video-demo.git
# Build front-end interface docker and api docker images
$ cd search-video-demo & make all
Step 2: Configure the environment.
Here we use docker-compose.yml to manage the above-mentioned five containers. See the following table for the configuration of docker-compose.yml:

The IP address 192.168.1.38 in the table above is the server address especially for building the video retrieval system in this article. You need to update it to your server address.
You need to manually create storage directories for Milvus, Redis, and Minio, and then add the corresponding paths in docker-compose.yml. In this example, we created the following directories:
/mnt/redis/data /mnt/minio/data /mnt/milvus/db
You can configure Milvus, Redis, and Minio in docker-compose.yml as follows:
Step 3: Start the system.
Use the modified docker-compose.yml to start up the five docker containers to be used in the video retrieval system:
$ docker-compose up -d
Then, you can run docker-compose ps to check whether the five docker containers have started up properly. The following screenshot shows a typical interface after a successful startup.
Now, you have successfully built a video search system, though the database has no videos.
Step 4: Import videos.
In the deploy directory of the system repository, lies import_data.py, script for importing videos. You only need to update the path to the video files and the importing interval to run the script.
data_path: The path to the videos to import.
time.sleep(0.5): The interval at which the system imports videos. The server that we use to build the video search system has 96 CPU cores. Therefore, it is recommended to set the interval to 0.5 second. Set the interval to a greater value if your server has fewer CPU cores. Otherwise, the importing process will put a burden on the CPU, and create zombie processes.
Run import_data.py to import videos.
$ cd deploy
$ python3 import_data.py
Once the videos are imported, you are all set with your own video search system!
4. Interface display
Open your browser and enter 192.168.1.38:8001 to see the interface of the video search system as shown below.
Toggle the gear switch in the top right to view all videos in the repository.
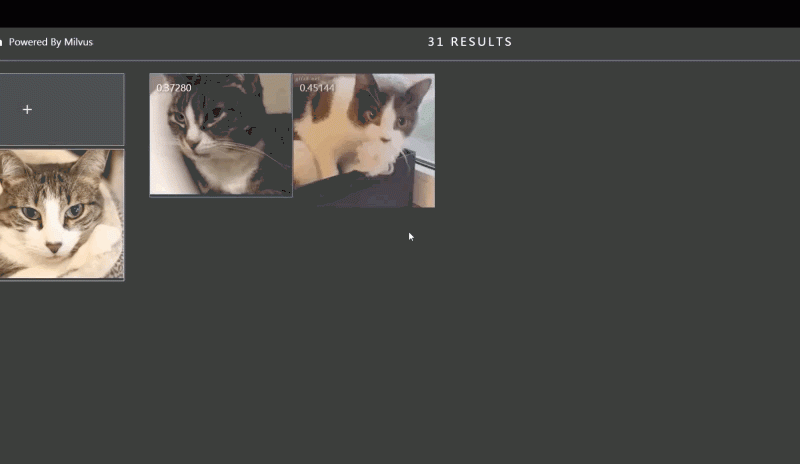
Click on the upload box on the top left to input a target image. As shown below, the system returns videos containing the most similar frames.
Next, have fun with our video search system!
5. Build your own
In this article, we used Milvus to build a system for searching for videos by images. This exemplifies the application of Milvus in unstructured data processing.
Milvus is compatible with multiple deep learning frameworks, and it makes possible searches in milliseconds for vectors at the scale of billions. Feel free to take Milvus with you to more AI scenarios: https://github.com/milvus-io/milvus.
